Commercial Photography · Aerial Photography · Studio Rental · Classes |

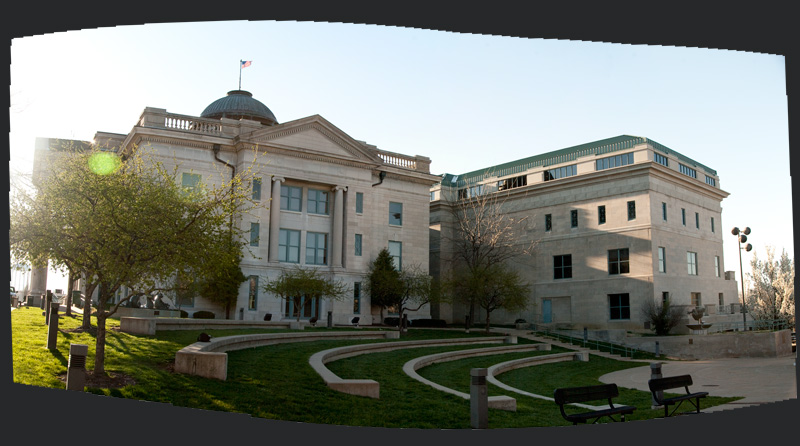
Last week we looked at some of the issues with architectural photography. Basically it boils down to the issue that buildings are BIG, and you typically can't get the perspective you want to shoot them. To some extent these issues can be overcome by using special camera equipment (view cameras or tilt-shift lenses) or by post-processing techniques (perspective correction), and that's what we saw last week. That works great if you can at least get the entire image you want in a single shot. Sometimes, though, you can't get far enough away to do that with any equipment, let alone whatever you happen to have available. (I'm discounting fisheye lenses here, because the severe distortion is almost impossible to do anything with. Only so-called "orthographic" lenses — those that provide limited distortion — are appropriate for most architectural photography.) For example, the clients that had me shooting the Boone County Courthouse addition wanted to show how beautifully the addition blended with the historic existing building. Unfortunately, there was a limit to how far away I could get without encountering lots of obstacles between me and the courthouse. The shot at the right was the best I could do with a 24 mm lens on a full-frame camera. It shows the addition (on the right), but only part of the original courthouse (on the left). Not really enough to get the idea across.
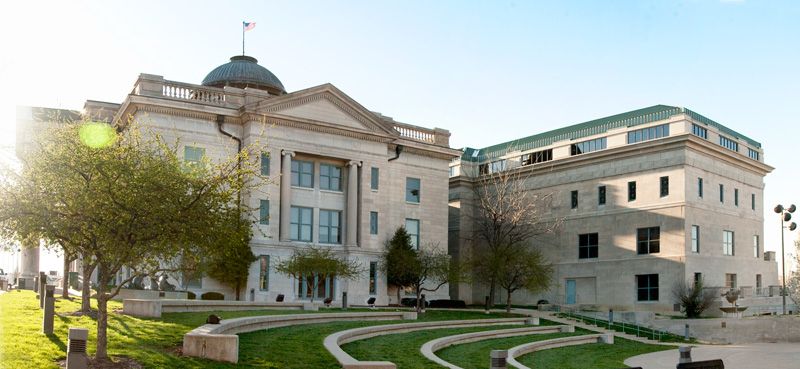
So what do you do in that situation? The trick I used was a photo composite. I took several shots in a horizontal pan, and stitched them together (composited them) to form a single image. It is very helpful to have a tripod with a pano head when doing this, though I've also done it hand-held. It's important to allow lots of overlap in the shots, so that the software can do a smooth job of stitching together the shots. It's also important to include lots of extra area in the shots — don't crop them closely in your viewfinder — as there will be distortions introduced as a result of the compositing and you'll need to crop away a fair amount of the resulting image. It's especially important to have extra vertical space in a horizontal pano (horizontal space for a vertical pano), and even more so if you are doing it hand-held.
For this exterior shot, I used the images shown below. I shoot them in raw format and then edit them to PhotoShop .psd files, just to get a uniform exposure and white balance and correct any vignetting. Do not crop the images, rotate or otherwise distort them, nor do any local editing, or you will make it impossible for the compositing software to work. I use PhotoShop's photomerge tool (File/Automate/Photomerge), though there are a number of other standalone and plug-in tools that also work well. You can see the effects of the wide-angle distortion in the raw images below. Don't worry about correcting those before the photomerge, the software will take that into account.

The result of the photomerge is shown at right. You can see it did a nice job of blending the images based on the content, but there were inevitable distortions. These distortions are not as simple as those of a single shot, either. The Lens Distortion filter will not generally help here. You will have to use the general transform tools (Skew, Warp and Distort) and sometimes even the Liquefy filter to correct these distortions. You will also need to crop the image to give a rectangular field that contains what you want. In this case, the finished image is at the left.
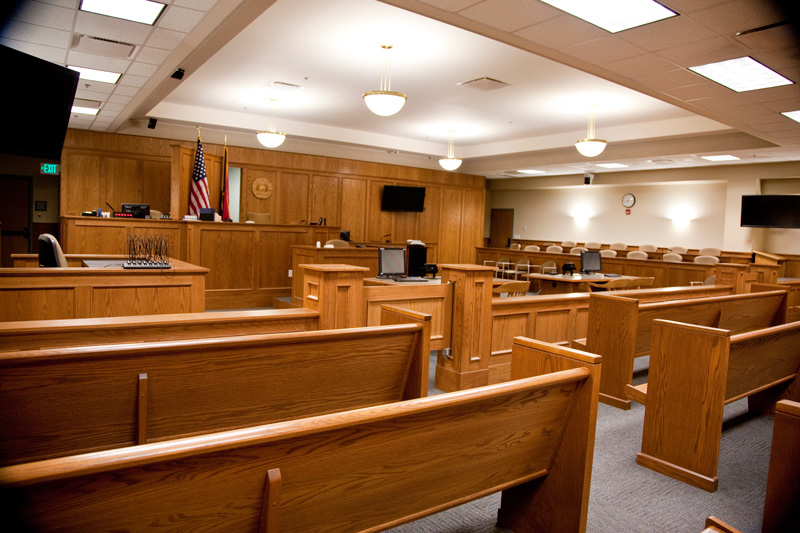
This same technique can be applied equally well in interior shots, where it's frequently impossible to get far enough away to show an entire room in a single shot. Even in a large room such as the "technology courtroom" at the Boone County Courthouse, it was barely possible to show the gallery, the recorder's station, the defendant's and prosecutor's tables, the judges bench, the witness stand, the jury box, and all the media display screens in a single shot. The best single image is shown at the right. In order to get everything in, there are tremendous distortions which will be hard to correct, and only a small portion of the gallery is visible, not giving a true perspective of the size and beauty of this courtroom.
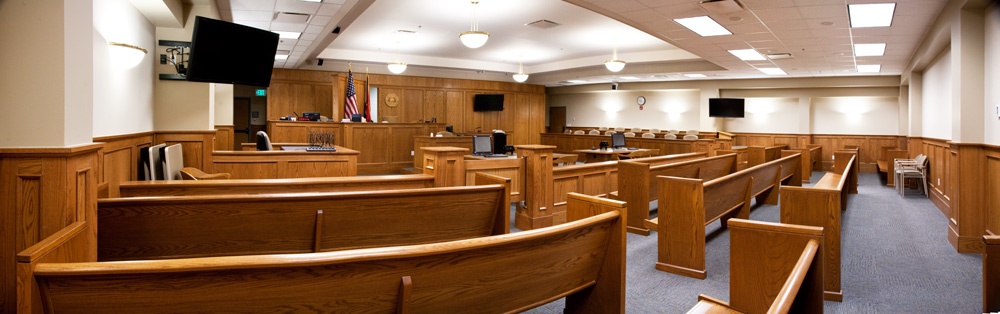
Instead, by compositing nine images together it was possible to produce the image below. This shot does a better job of showing the impressive size and scope of the courtroom than any single shot could do. On the other hand, it does suffer from distortions common to such composites, especially those (like this) spanning more than 90 - 120°. Note especially the bench at the left foreground. It appears curved, and that's after corrections to straighten it. These curvatures are part and parcel with wide angle panoramas, but are something the eye easily accommodates when viewing these composites. In my opinion, the improved scope of the image makes up for the inevitable distortions. What do you think? As always I welcome your comments!!
Next week we'll move the focus into the studio. I'm not sure yet what aspect of the studio I'll be showing, but there's lots to cover there. Is there something you would like to see? Happy shooting!
-Art
Back to The Photographer's Journal
| ©2008 ArtSmith Photography, all rights reserved. | Home • Portfolio • About ASP • Capabilities • Pricing • Contact • Journal |